24 Fall Wreath-Making Ideas for Beginners
Fall Wreath Making Ideas for Beginners, Wreath making looks intimidating from the outside, full of terms like “form base,” “floral wire,” and “hot glue placement” but almost every fall wreath boils down to one of a small handful of repeatable techniques. Once you understand those techniques, all 24 ideas below become variations on the same simple process: attach material to a base, layer for fullness, and finish with one focal point like a bow or a cluster of picks. None of these require prior crafting experience, a glue gun you’ve used before, or a trip to a specialty craft store. Pick one that matches materials you already like, and you’ll have a finished wreath in under two hours.
This post contains affiliate links. As an Amazon Associate, I earn from qualifying purchases. If you buy through these links, I may earn a small commission at no extra cost to you.
What Ties These Ideas Together
Every wreath on this list, no matter how different it looks, follows the same three-step logic: base, layer, focal point. The base is the foundation shape grapevine, straw, wire, or foam and it determines how sturdy and how “full” your finished wreath can look. The layer is whatever material you’re attaching to that base, whether it’s faux leaves, dried florals, ribbon, or fabric, and this is where most of the visual texture comes from; more layers generally mean a fuller, more expensive-looking wreath, but even a single well-chosen layer can look intentional if it’s applied with some variation in direction and density. The focal point is the one thing your eye lands on first usually a bow, a cluster of picks, or a monogram and it’s what keeps a wreath from looking like a flat ring of one repeated material. Understanding this base-layer-focal-point structure means you can mix and match ideas from this list freely instead of following any single tutorial exactly.
1. Classic Grapevine Base with Dried Leaves and a Bow
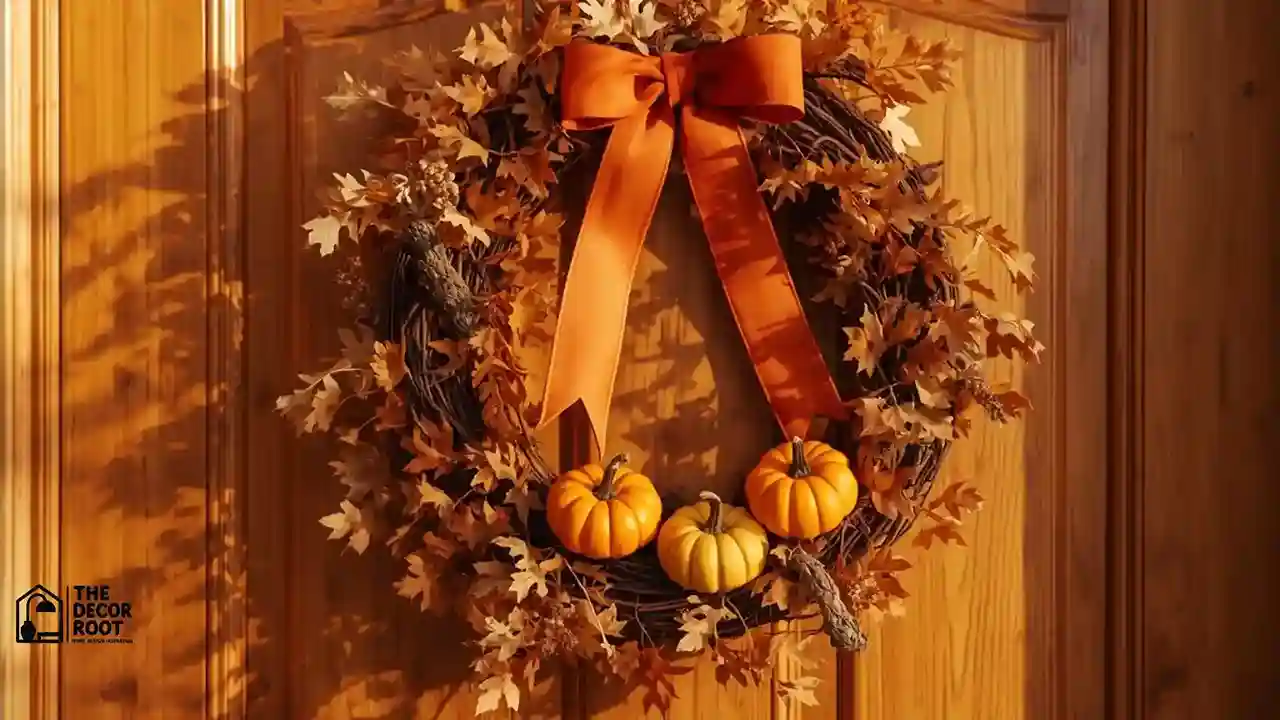
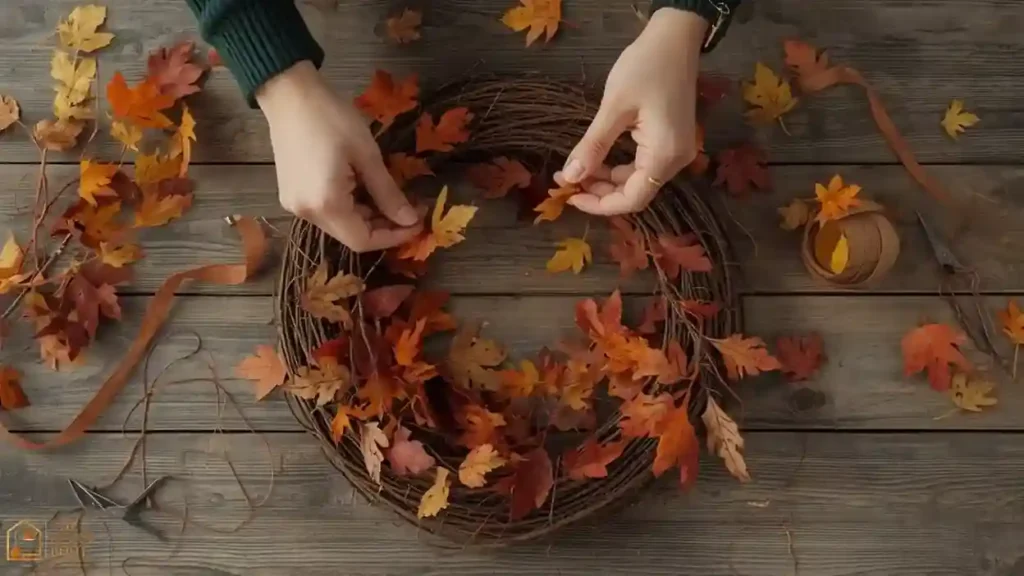
This is the most forgiving starting point for a first wreath because grapevine bases are naturally uneven, which hides small mistakes instantly. Buy a pre-made grapevine wreath form, tuck faux dried oak or maple leaf stems into the gaps around the vine at varying angles, and finish with a wired ribbon bow at the bottom or top. You don’t need glue for this one the leaf stems wedge into the natural gaps in the grapevine and stay put on their own, which makes it genuinely the easiest wreath on this entire list to complete. Aim for leaves clustered more heavily on one side (about two-thirds of the ring) rather than spaced perfectly evenly, since asymmetry reads as more natural and less “kit-made.”
2. No-Glue-Gun Ribbon Wrap Wreath
If a hot glue gun feels intimidating, this design skips it entirely. Take a plain foam or straw wreath form and wrap wide ribbon around the entire ring, securing the start and end with a straight pin or small dab of craft glue rather than a full glue gun. Use two ribbon colors a solid rust or cinnamon and a plaid or striped accent wrapped in alternating sections for visual interest. This is the single most beginner-proof wreath idea here since there’s no cutting stems, no wiring, and no heat tools involved at all, making it a genuinely good first project for a kid or a total beginner working alone.
3. Faux Eucalyptus and Wheat Combo Wreath
Pair faux eucalyptus stems with dried wheat stalks for a wreath that reads as elevated and slightly less “traditional pumpkin orange” than most fall designs. Attach both materials to a grapevine or wire base using floral wire, working in one direction around the ring so all the stems point the same way, which creates a wind-swept, cohesive look rather than a chaotic one. Leave one small gap near the bottom for a simple raffia or jute bow. This combination photographs particularly well against a neutral or dark front door, since the muted green and warm wheat tones stand out clearly without competing with a busy background.
4. Sturdy Grapevine Wreath Base for Layered Builds
EDITOR’S PICK
🛒Grapevine Wreath Base For Layering Multiple Materials
A 14–16 inch tightly wound grapevine base is a versatile, reusable foundation for multiple wreath designs.
(paid link)
A good-quality grapevine base is the single most reusable purchase in this entire list, since you can strip a finished wreath down at the end of the season and rebuild it completely differently the following year using the same base. Look for one that’s tightly wound rather than loose, since a loose base makes it harder to tuck stems in securely without wire. A 14-16 inch base is the sweet spot for most front doors large enough to feel substantial, small enough to still fit comfortably within a standard door frame without overwhelming it. This base works for at least six other ideas on this list, making it one of the better one-time investments for anyone planning to make more than one wreath.
5. Layered Faux Pumpkin Cluster Wreath
Instead of spreading pumpkins evenly around the ring, cluster three to five small faux pumpkins together at the bottom or side of the wreath in varying sizes, tucked among faux leaves or greenery. This clustering technique is a genuine design trick professional stylists use constantly: grouped odd numbers of similar objects read as intentional, while evenly spaced single objects read as an afterthought. Secure the pumpkins with floral wire looped through their faux stems and wrapped around the wreath base. This idea works especially well on a grapevine or straw base where the pumpkins have gaps to nestle into rather than sitting flat against a smooth foam ring.
6. Plaid Flannel Fabric Bow Wreath
Skip ribbon entirely and make your bow out of a scrap of plaid flannel fabric instead it’s genuinely easier for beginners since flannel doesn’t fray as quickly as thinner ribbon and holds a shape well when tied. Cut a long strip roughly 6 inches wide, tie it in a simple loose bow around a plain grapevine or leaf-covered wreath, and let the tails hang unevenly rather than trimming them perfectly straight. This is a great option if you already have flannel fabric scraps at home from another project, since it requires zero specialty crafting supplies beyond scissors and the fabric itself.
7. Dried Orange Slice and Cinnamon Stick Accent Wreath
For a wreath that also smells like fall, dry orange slices in a low oven (around 200°F for 2-3 hours) and wire them onto a grapevine base alongside small bundles of cinnamon sticks tied together with jute twine. The dried orange slices add unexpected pops of warm color against green or brown materials, and the cinnamon genuinely does release scent when the door opens and closes, giving this wreath a sensory element none of the purely visual ideas on this list have. This one takes longer overall because of the drying time, but the actual assembly is quick and simple once your slices are ready.
8. Monochromatic All-Green Faux Foliage Wreath
Not every fall wreath needs orange, rust, or brown an all-green wreath using different faux foliage textures (eucalyptus, ferns, small leafy stems) creates a more subtle, elevated look that works beautifully layered with a single warm-toned bow for contrast. Mix at least three different leaf shapes and sizes for texture variety even though the color stays consistent, since texture is what keeps a monochrome design from looking flat or boring. This is a strong option for anyone who wants their wreath to transition smoothly from early fall through Thanksgiving without needing a full pumpkin-heavy redesign partway through the season.
9. Wired Wreath Base for Custom Shapes and Heavier Materials
EDITOR’S PICK
🛒Wire Wreath Form And Floral Wire Set For Securing Heavier Materials
Wire base with floral wire and cutters supports heavier wreath materials and is reusable for future projects.
(paid link)
A wire base is the step up from grapevine for anyone ready to attach heavier materials like real dried florals, larger pumpkins, or bundled foliage, since it gives you more secure attachment points than tucking into vine gaps alone. A basic wire cutter and floral wire set makes attaching material genuinely simple: wrap wire around both the stem and the wreath ring, twist to secure, and trim the excess. This combination opens up several of the sturdier designs later in this list that wouldn’t hold up well on a looser grapevine base, and the wire cutters are reusable for every wreath you make going forward, not just this one project.
10. Rustic Burlap Ribbon Loop Wreath
Instead of a traditional single bow, create a series of small burlap ribbon loops spaced evenly around a wire or straw base for a textured, rustic look that reads as “fall” even without any leaves or pumpkins at all. Cut burlap ribbon into 6-inch loops, secure each loop’s ends together with a dab of glue or a twist tie, and attach loops around the ring so they overlap slightly, covering the base completely. This is a good option if you want a wreath with heavy texture but minimal fuss over color matching, since natural burlap works with almost any front door color.
11. Faux Sunflower and Wheat Late-Summer-Into-Fall Wreath
For the early part of fall when it still feels more like late summer, faux sunflowers paired with wheat stalks and a small amount of greenery create a wreath that bridges both seasons without looking out of place in September. Cluster three or four sunflower stems together as the focal point rather than spacing them individually around the ring, and fill in gaps with wheat and greenery. This design transitions well into October if you simply add a few dried leaf stems around the existing sunflower cluster rather than starting over completely.
12. Layered Autumn Leaf Ombre Wreath
Create a color gradient effect by using faux leaf stems in different shades start with yellow-green at one point on the ring, transition through gold and orange, and end in deep rust or burgundy at the opposite point. This ombre technique takes slightly more planning than a random mix but creates a genuinely striking, more advanced-looking result for beginners willing to sort their leaf stems by color before starting. Attach the leaves to a grapevine or wire base, working in one continuous direction so the color transition reads smoothly rather than in obvious blocky sections.
13. Simple Jute Twine Wrapped Letter or Monogram Wreath
Instead of a full circular wreath, wrap jute twine tightly around a wooden letter or monogram cutout (your house number or last initial works well) to create a smaller, doorside accent piece rather than a full wreath. Hot glue the twine at the starting point, wrap tightly and evenly around the entire letter shape, then finish with a small bow or a few faux leaf stems glued at one corner. This is a great low-commitment beginner project if a full-size wreath still feels like too much, since it uses significantly less material and takes less time from start to finish.
14. Reliable Hot Glue Gun Kit for Secure Attachments
EDITOR’S PICK
🛒Compact Hot Glue Gun Kit For Securing Wreath Elements Permanently
A mini hot glue gun with a stand and extra sticks accelerates and secures wreath projects, bonding best on textured surfaces like grapevine or straw for added control.
(paid link)
While several ideas on this list are glue-free, a basic hot glue gun genuinely opens up faster, sturdier options once you’re ready for it, especially for pumpkins, bows, and picks that need to stay firmly in place through wind and weather. A mini glue gun with a stand and a bundle of glue sticks is inexpensive and beginner-friendly the smaller size gives more control for detail work than a full-size gun. Always glue onto a slightly roughed-up or porous surface (grapevine and straw both work well) rather than smooth plastic, since hot glue bonds better to texture. This tool alone will speed up roughly half the remaining ideas on this list.
15. Layered Velvet Ribbon and Dried Leaf Combo
Velvet ribbon in a deep wine, rust, or forest green adds a slightly more upscale texture than standard satin or grosgrain ribbon, and it pairs especially well against matte dried leaves rather than shiny faux ones. Wrap the velvet ribbon partially around a grapevine base in one or two sections rather than the entire ring, then tuck dried or faux leaf stems in around and over the ribbon so the two materials overlap slightly. This layered approach creates real depth without needing more than two total materials, which keeps the project simple even though the finished result looks more complex.
16. Faux Cotton Stem Wreath for a Neutral, Farmhouse-Adjacent Look
Faux cotton stems create a wreath that leans more neutral farmhouse than traditional bold-orange fall, which works especially well if your front door or porch already has a muted color palette. Attach cotton stems densely around a grapevine base, working them in slightly overlapping clusters rather than spaced individually, since cotton bolls look best in fuller groupings. Finish with a simple jute or cream ribbon bow rather than anything in a bright color, keeping the whole piece intentionally monochromatic and calm.
17. Mixed Foraged Natural Elements Wreath
If you have access to a yard or park with fallen leaves, pinecones, or small branches, a foraged wreath costs almost nothing beyond the base itself. Collect a variety of natural materials, let anything damp dry out for a day or two, then wire or glue them onto a grapevine base in small clusters. Mixing textures smooth pinecones against papery leaves against rough bark creates natural visual interest without needing any purchased faux florals at all. This is one of the most budget-friendly ideas on the entire list since the materials are essentially free.
18. Layered Faux Berries and Greenery Wreath
Faux berry stems (in deep red, burgundy, or orange) threaded through a base of faux greenery create a wreath with small pops of concentrated color rather than large solid blocks. Attach the greenery base layer first, covering the full ring, then go back through and tuck berry stems in at varying depths so some sit close to the base and others poke out further, creating dimension. This layering-in-passes technique base material first, accent material second is a simple trick that makes almost any wreath design look more professionally finished.
19. Full Faux Fall Stem Bundle for a One-Purchase Layered Look
EDITOR’S PICK
🛒Mixed Faux Fall Stem Bundle For Quick, Cohesive Wreath Layering
Pre-mixed fall stem bundle eliminates guesswork and extra trips for a quick, cohesive wreath.
(paid link)
For beginners who don’t want to source and color-match multiple separate materials, a single pre-mixed bundle of faux fall stems (leaves, small berries, and wheat all included) removes the guesswork entirely, since the color palette is already coordinated for you. Simply cut the bundle apart into individual stems and distribute them around a grapevine or wire base, working in one direction. This is genuinely the fastest path from “empty wreath base” to “finished, cohesive wreath” on this entire list, since one bundle typically provides enough material and enough built-in color variety to skip additional shopping trips entirely.
20. Layered Two-Tone Ribbon Bow as the Sole Focal Point
Sometimes the entire wreath can be a plain, densely-covered greenery or leaf base with all the visual interest concentrated in one oversized, two-tone ribbon bow. Use two ribbon colors like a solid rust and a plaid cream/brown layered together into a single large bow tied at the bottom of the wreath. This “one big focal point” approach is genuinely easier for beginners than distributing several smaller accents around the ring, since all your effort and attention goes into a single element instead of managing balance across the whole design.
21. Faux Magnolia Leaf and Pinecone Wreath
Large faux magnolia leaves (with their signature dark green top and fuzzy brown underside) create a substantial, textured base layer when overlapped like shingles around a wire form, with small faux pinecones wired in between leaves for added dimension. This design skips bright fall colors almost entirely in favor of deep green and brown, making it a strong option for a more traditional or formal front entrance. The overlapping leaf technique takes a bit more patience than other ideas on this list but doesn’t require any skill beyond wiring one leaf at a time, working around the ring in a single direction.
22. Layered Faux Hydrangea and Fall Foliage Wreath
Faux hydrangea blooms in a warm rust or dusty burgundy tone add soft, rounded texture that contrasts nicely against pointier faux fall leaves. Attach two or three hydrangea stems as a clustered focal point on one side of the wreath, then fill the remaining ring with faux leaf stems working outward from that cluster. This combination photographs especially well in soft natural light, since the hydrangea’s texture catches shadow and highlight differently than flat leaf stems, adding real visual depth to photos of the finished piece.
23. Coordinated Ribbon Bundle for Custom Bow-Making
EDITOR’S PICK
🛒Wired Ribbon Bundle For Creating Custom Multi-Loop Bows
A wired ribbon bundle with coordinated fall tones, layered widths, and a shapable edge lets beginners make professional bows and covers multiple wreaths.
(paid link)
A wired ribbon bundle in coordinated fall tones gives beginners the flexibility to build a custom multi-loop bow rather than relying on a single pre-made ribbon color, and the wired edge holds a shape far better than plain ribbon, which matters a lot when you’re still learning to tie a full, professional-looking bow. Layer two or three ribbon widths and patterns together before tying, twisting each loop slightly as you go for volume. This bundle typically includes enough ribbon for several wreaths, making it one of the more reusable purchases on this list beyond just the current project.
24. All-Neutral Textural Wreath with No Bright Fall Colors
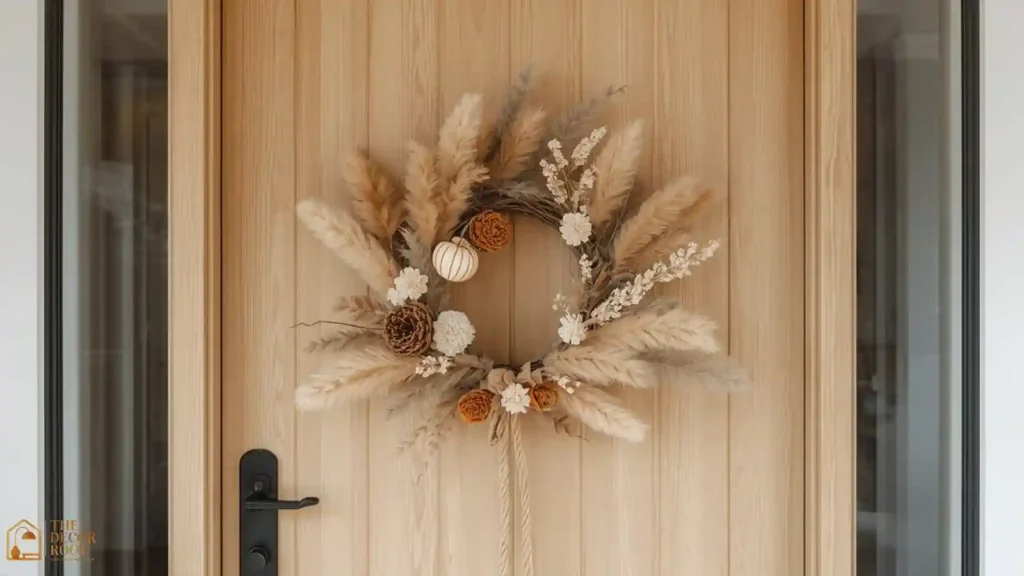
For anyone whose home leans more modern or minimalist, a fall wreath doesn’t have to mean orange and rust at all. Combine dried pampas grass, cream-toned dried florals, and a small amount of muted sage greenery on a natural grapevine base, finished with a simple raffia tie instead of a ribbon bow. This all-neutral approach still reads clearly as “fall” through texture and dried materials alone, without relying on traditional autumn color cues, and it tends to have a longer shelf life on the door since it doesn’t feel tied to one specific holiday or color moment.
Quick Action Plan
- Start with idea #1 or #2 if this is genuinely your first wreath; both are glue-free and forgiving of mistakes.
- Once you’re comfortable with the basic base-layer-focal-point structure, move on to a design using the glue gun (#14) or wire and cutters (#9) for more secure, sturdier results.
- Budget for one grapevine base ($8-12), one bundle of faux stems ($10-15), and ribbon ($5-8) for your first project, which keeps a beginner wreath around $25-35 total.
- Give yourself 60-90 minutes for your first attempt, and don’t rush the layering step; most beginner wreaths look unfinished not because of skill, but because materials weren’t layered in enough passes around the ring.
Frequently Asked Questions
Conclusion
Every wreath on this list comes back to the same simple structure: a base, a layer of material, and one clear focal point, so once you’ve made one, the other twenty-three stop looking intimidating and start looking like easy variations.