20 Iced Drink Station Styling Ideas
Iced Drink Station Ideas: Once the weather turns warm, the single most useful thing you can add to any gathering isn’t more food; it’s a drink station guests can serve themselves from without asking you every ten minutes. A well-styled iced drink station solves the hosting bottleneck and doubles as one of the most photographed corners of a summer party, provided it’s set up with actual thought given to flow, ice management, and how guests will realistically move through the line. An iced drink station is one of the most seasonally satisfying home decorating ideas for summer; a styled cooler or drinks tub with the right glassware, garnishes, and a few considered accessories elevates a backyard gathering from casual to genuinely hosted in a single afternoon of setup.
This post contains affiliate links. As an Amazon Associate, I earn from qualifying purchases. If you buy through these links, I may earn a small commission at no extra cost to you.
Where to Start Mentally
Before picking a single container or garnish, think through the station the way a guest actually experiences it: they walk up, they need to see their options immediately, they need somewhere to set down a used cup or straw wrapper, and they need to get back out of the way for the next person. Every idea in this list is built around that actual flow rather than pure visual styling, because a beautiful drink station that creates a bottleneck is worse for your party than a plain one that moves people through quickly. Once that flow is solved, the styling choices below are what turn it from “functional” into something people specifically remember. An iced drink station indoors and a no-bake kitchen are the same summer instinct expressed at two different scales: the desire to keep the kitchen cool, fresh, and functional without generating heat. These summer kitchen and cold drink ideas show how to style a kitchen counter around a drink station so the indoor and outdoor summer aesthetic feel connected.
Create Your Iced Drink Station
An iced drink station is the refreshment layer of a complete outdoor entertaining design. browse all our seasonal decorating ideas for tiki bar corners. An iced drink station is the functional core of a tiki bar setup; these tiki bar and drink station ideas show how to integrate a styled cooler or drink tub into the bar surface so the ice, the glassware, and the garnish display all read as part of one composed bar rather than a collection of separate elements. Poolside bar carts, movie night setups, and al fresco dining ideas that build the outdoor occasion your drink station belongs within.
1. Use two or three beverage dispensers instead of one large one.
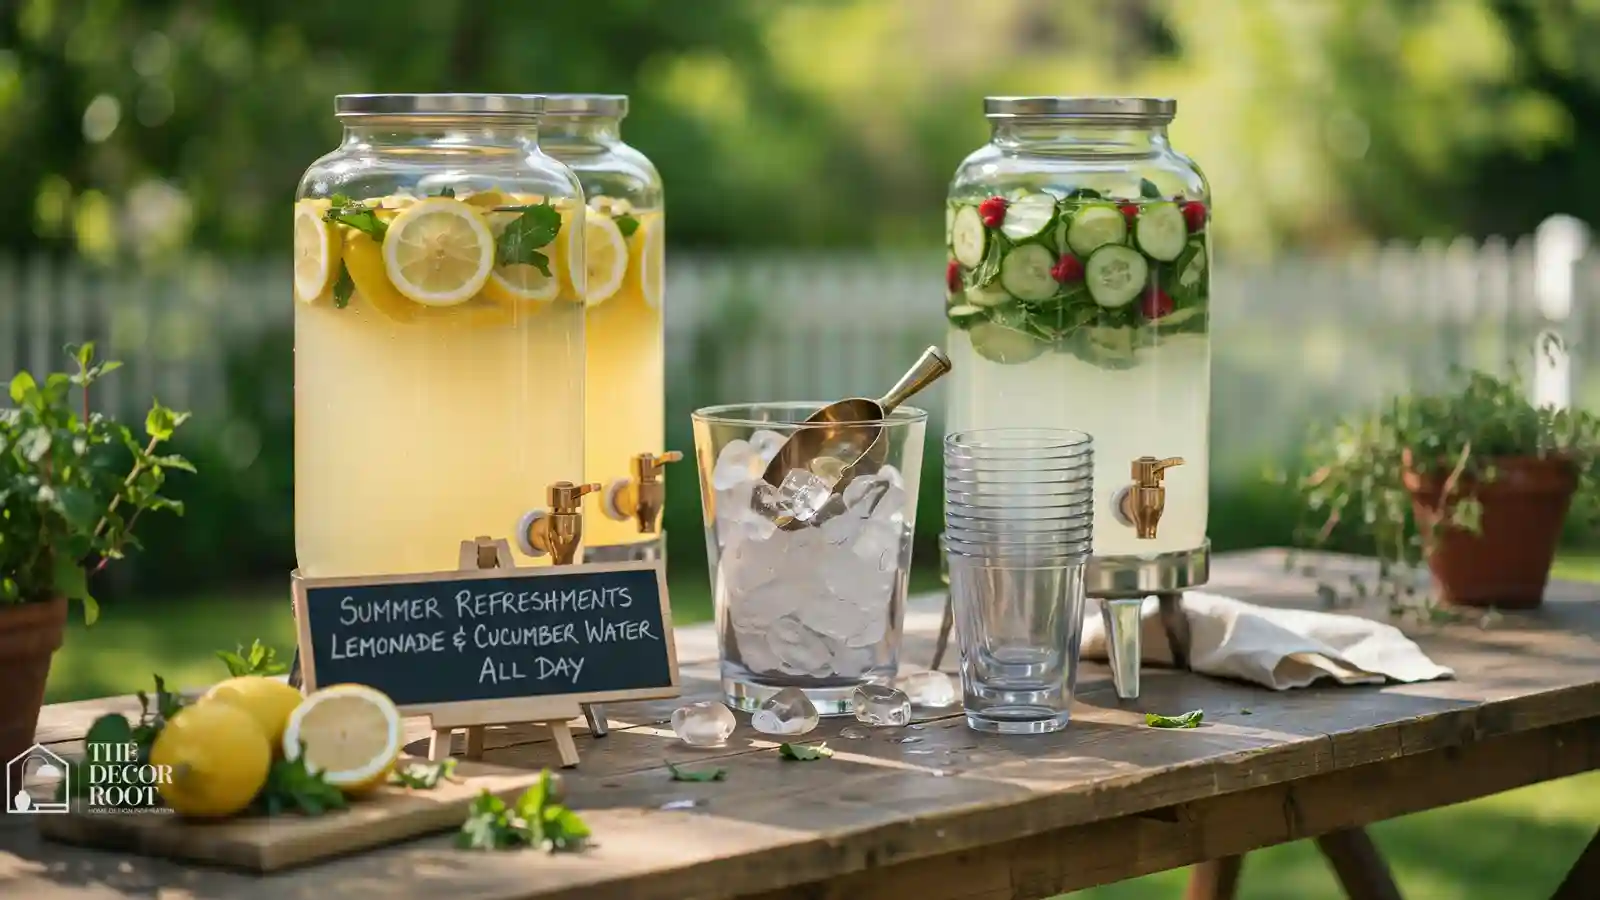
Splitting your drinks across several smaller dispensers, rather than one giant one, lets guests choose between options like lemonade, iced tea, and infused water without a bottleneck forming at a single spout, and it’s far easier to refill one smaller dispenser mid-party than to haul a single massive one back to the kitchen.
2. Add a designated “used cup” bin at the end of the line.
A simple labeled bin or basket positioned after the last drink option, rather than leaving guests to figure out where dirty cups go, keeps the station looking fresh for hours instead of accumulating clutter within the first thirty minutes.
3. Choose a glass beverage dispenser with a working spigot as your centerpiece.
A beverage dispenser with a spigot in the 2-to-3-gallon range gives guests a clean, no-drip way to serve themselves and looks noticeably more finished on a table than a pitcher that needs constant pouring and refilling.
EDITOR’S PICK
🛒Glass Beverage Dispenser With Stainless Steel Spigot, 2.5 Gallon
A 2- to 3-gallon spigot dispenser lets guests pour their own drinks cleanly and looks far more finished on a table than a pitcher that needs constant refilling.
(paid link)
4. Add fresh fruit directly inside the dispenser, not just as garnish on the side.
Slicing citrus, berries, or cucumber directly into the dispenser itself, rather than serving it only as a side garnish tray, infuses the drink over the course of the party and gives the dispenser a naturally styled look without any extra work.
5. Group cups by size near their intended drink, not all together.
Placing smaller cups near lighter drinks like infused water and larger cups near iced tea or lemonade, rather than one universal cup pile, subtly guides portion sizes and keeps the whole line moving faster since guests aren’t second-guessing which cup goes with what.
6. Use a two-tier stand to separate drinks from snacks.
If your drink station shares table space with light snacks, a tiered stand physically separates the two categories, which prevents crumbs and food debris from ending up near the beverage dispensers over the course of an afternoon.
7. Add a chalkboard label in front of each dispenser.
Rather than one general station sign, individual small labels in front of each specific drink tell guests exactly what they’re pouring before they commit, which matters especially for drinks that look visually similar, like different flavors of infused water.
8. Keep a dedicated ice bucket separate from the drinks themselves.
An acrylic ice bucket with matching tongs, positioned just before the dispensers in the line, lets guests add ice to their own cup before pouring rather than relying on pre-chilled drinks that warm up as the afternoon goes on.
EDITOR’S PICK
🛒Acrylic Ice Bucket With Lid And Matching Tongs
Place an acrylic ice bucket with tongs before the dispensers so guests can self-serve ice first, keeping drinks colder longer than pre-chilled alternatives that warm throughout the afternoon.
(paid link)
9. Use a natural material runner or tray to visually unify the whole station.
A single wood, rattan, or linen runner placed under all the dispensers and cups ties the whole table together as one cohesive station rather than a collection of separate items placed randomly across the surface.
10. Add a small garnish caddy with compartments for mix-ins.
A divided tray holding mint sprigs, lemon wheels, and berries lets guests customize their own drink beyond what’s already infused in the dispenser, adding a self-serve, build-your-own element that guests tend to genuinely enjoy at summer gatherings.
11. Position the station somewhere with easy refill access, not just good lighting.
As tempting as it is to set the drink station up purely for how it photographs, placing it within a short walk of your kitchen or an outdoor spigot saves you from hauling full water pitchers across the whole yard every time something runs low.
12. Use color-coordinated straws to match your event’s overall palette.
Simple paper straws in one or two coordinated colors, rather than a mismatched multicolor pack, is a five-dollar upgrade that makes the entire drink station photograph noticeably more cohesive.
13. Set the whole station on a dedicated wooden tray or cart.
A wooden drink station tray large enough to hold your dispensers, cups, and garnish caddy together defines clear boundaries for the station on a shared table and makes the whole setup easy to carry indoors at once if weather changes.
EDITOR’S PICK
🛒Large Acacia Wood Serving Tray For Drink Stations
A large wooden drink tray holds dispensers, cups, and garnishes as one unit, defines the station on a shared table, and allows quick indoor transfer when weather turns.
(paid link)
14. Add a small basket of napkins right at guest eye level.
Napkins placed in a low basket directly beside the cups, rather than folded flat somewhere less visible, get used far more consistently, which matters directly for how much drink condensation ends up on your table or furniture by the end of the party.
15. Use mason jar mugs with handles for easy carrying.
Handled jar-style mugs are easier for guests to carry back to their seat than a standard flat-bottomed cup, especially for kids or anyone also holding a plate, and they photograph with a distinctly summer, casual-entertaining look.
16. Add a small chalkboard “menu” listing each drink option by name.
Beyond individual dispenser labels, a single small sign with all options listed together works especially well at the entrance to the station, letting guests decide before they even reach the line rather than deliberating once they’re standing in front of it.
17. Include a non-alcoholic option positioned prominently, not as an afterthought.
Placing a clearly labeled mocktail or infused water option at the same eye-level prominence as any alcoholic drinks, rather than tucked at the end, makes non-drinking guests feel considered rather than like an afterthought addition.
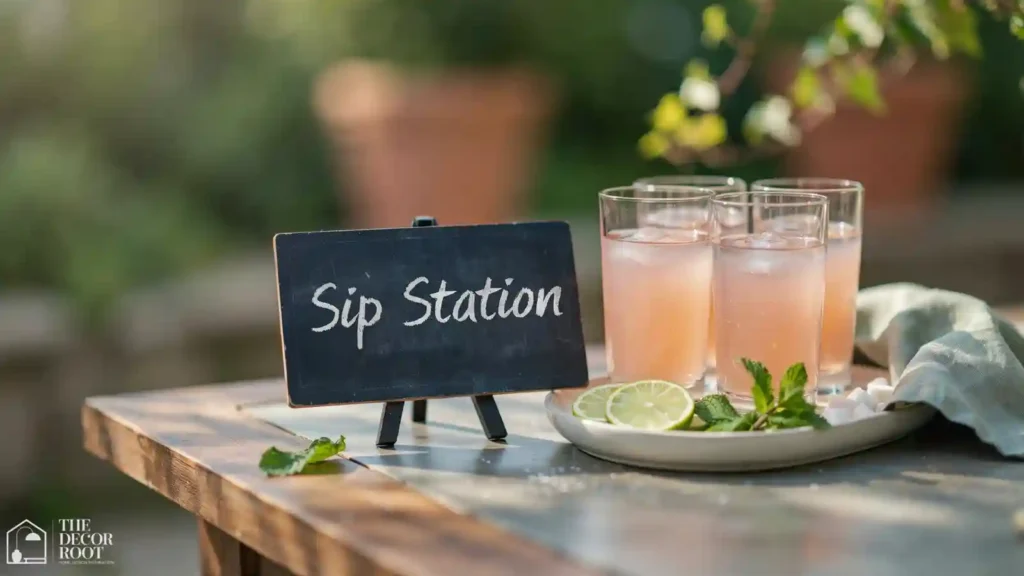
18. Add a small chalkboard sign with a fun drink station name.
A chalkboard drink sign reading something like “Sip Station” or “Cool Down Corner” gives the whole setup a distinct identity and doubles as one of the most-photographed small details at a summer gathering.
EDITOR’S PICK
🛒Small A-Frame Or Tabletop Chalkboard Sign, Party-Sized
A chalkboard drink sign reading “Sip Station” or “Cool Down Corner” gives the station a distinct identity and serves as a favorite photo-worthy detail at summer gatherings.
(paid link)
19. Use a shallow tub of ice for bottled drinks alongside your dispensers.
For guests who prefer a canned or bottled drink over anything from a dispenser, a separate shallow galvanized tub filled with ice keeps those options equally cold without competing for space on the main dispenser table.
20. Refresh the garnish and ice roughly every two hours for longer events.
For any gathering running more than a few hours, a quick mid-party refresh of wilting garnish and melted ice keeps the station looking as good in hour four as it did at the start, which matters more for how the space is remembered than almost any initial styling choice.
Quick Action Plan
- Begin with the pieces that require zero purchases at all: the fruit-infused water pitcher, the fruit and cheese board, and rearranging produce into baskets away from the stove, since these establish the no-bake mood immediately and cost nothing.
- From there, prioritize the food processor and blender over the ice cream maker and mini fridge drawer, since those two appliances cover the widest range of actual no-bake and no-cook recipes for the investment.
- Treat the ice cream maker as the season’s one splurge item once the rest of the station is running smoothly.
An iced drink station and a poolside bar cart solve the same outdoor entertaining challenge: how to present drinks in a way that looks as good as it functions. These outdoor bar and drink styling ideas show how a bar cart elevates the same cooler-and-glassware setup into a styled feature that anchors the poolside zone and gives guests a destination within the outdoor space.
Frequently Asked Questions
Conclusion
A no-bake kitchen doesn’t mean giving up on styling the room; if anything, this approach gives you a whole new set of textures, tools, and focal points to work with while keeping the house genuinely cooler.
💾 Save this to your Summer Kitchen Ideas board on Pinterest to reference while you shop.