24 Ribbon and Bow Christmas Tree Ideas
Ribbon and Bow Christmas Tree Ideas. Ribbon gets treated as an afterthought on most trees: a strand looped on at the very end because the tree “needs a little something.” But used deliberately, ribbon and bows can carry an entire tree’s design, doing more visual work than half your ornament box combined. The trick is technique, not just yardage. A single roll of the right ribbon, used the right way, beats three mismatched rolls draped without a plan. This list breaks down 24 specific ribbon and bow techniques spirals, cascades, branch ties, and more so you can pick the two or three that fit your tree and actually execute them with confidence instead of guessing.
This post contains affiliate links. As an Amazon Associate, I earn from qualifying purchases. If you buy through these links, I may earn a small commission at no extra cost to you.
🎀 Where to Start Mentally
Before you touch a single ribbon roll, decide on one thing: is ribbon going to be your tree’s main event, or a supporting layer under ornaments? That single decision changes everything else: how much ribbon you buy, which techniques you use, and how much open branch space you leave for it to actually show. Trees that use ribbon well almost always answer that question first, then build the rest of the decorating plan around the answer. If ribbon is your star, use fewer ornaments so the ribbon techniques have visual room to breathe. If ribbon is support, keep it to one or two techniques max, so it doesn’t compete with your ornament styling.
24 Ribbon and Bow Ideas for Your Christmas Tree
1. The Classic Diagonal Spiral
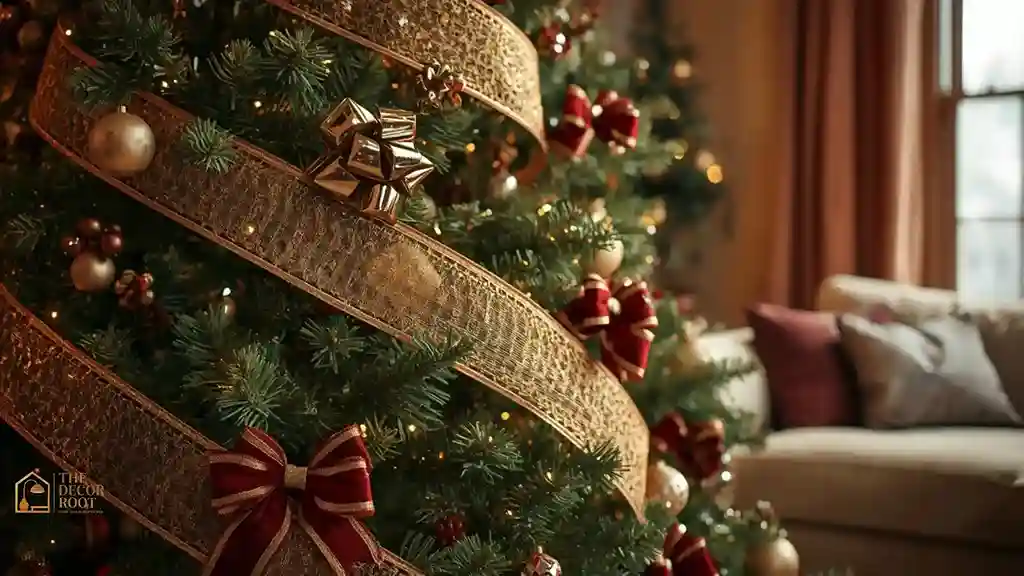
Start at the top of the tree and wind one continuous length of ribbon diagonally downward, following the tree’s natural cone shape rather than wrapping horizontally. This is the single most requested ribbon look because it reads as movement rather than a static loop, and it works on trees of nearly any size. Use wired ribbon so the spiral holds its shape between branches instead of sagging flat.
2. Double Spiral in Two Widths
Once you’ve mastered a single spiral, try adding a second, narrower ribbon spiraling in the same direction, offset slightly from the first. Two ribbons moving together in parallel reads richer than one, as long as they’re moving in the same diagonal direction; spirals crossing each other in opposite directions tend to look tangled rather than intentional.
3. Vertical Ribbon “Waterfall” Panels
Instead of spiraling, cut several lengths of ribbon and let them hang vertically from top to bottom in three or four evenly spaced spots around the tree, like curtain panels. This creates a completely different visual rhythm than a spiral more structured, more modern and works especially well with wider ribbon that has visible weight when it hangs straight down.
EDITOR’S PICK
🛒Wired Ribbon By The Roll
For a modern, structured look, hang wide ribbon vertically in evenly spaced curtain‑like panels instead of spiraling.
(paid link)
4. The Bow Cascade From the Topper Down
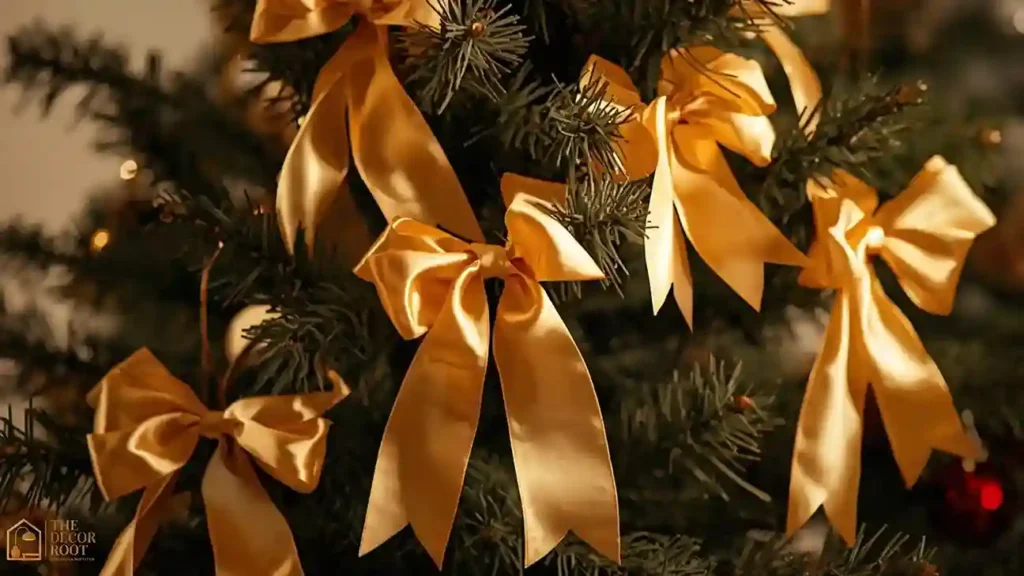
Attach three to five bows in graduating sizes running down from just below the topper, each roughly 20 percent smaller than the one above it, with tails left long enough to rest against the branches below. This draws the eye down through the tree in a single visual line and works beautifully as the sole ribbon technique on a tree that’s otherwise ornament-focused.
5. Branch-Tip Bow Ties
Rather than large statement bows, tie small, tight bows directly around individual branch tips at regular intervals around the tree. This is a subtler, more textural use of ribbon than a spiral or cascade, and it’s especially useful for artificial trees with slightly sparse branch tips, since the small bows add visual bulk exactly where thin branches need it.
6. Oversized Single Bow as a Focal Point
Instead of many small bows, commit to one genuinely oversized bow 12 inches or wider placed at a single focal point, often the upper third of the tree just below the topper, or centered at the front. One dramatic bow can carry more visual weight than a dozen small ones, and it’s a far faster technique to execute if you’re short on decorating time.
7. Ribbon Woven Horizontally Between Branch Layers
Rather than draping over the surface, thread ribbon horizontally in and out of the branch layers at two or three levels around the tree, so it disappears behind branches and reappears further along. This creates a more integrated, “grown into the tree” look rather than ribbon that clearly sits on top of everything else.
8. Two-Tone Ribbon Bows Using Contrast Backing
Layer two different ribbon widths or colors together into a single bow: a wider ribbon as the base loops, a narrower contrasting ribbon layered on top for bows with more visual depth than a single-ribbon bow can achieve. This technique is especially effective for your hero focal bow (Idea 6), since the two-tone effect reads as more custom and less store-bought.
EDITOR’S PICK
🛒Contrasting Velvet Ribbon Roll
Layer a wider and narrower ribbon together for a custom, two‑tone bow with more depth than a single ribbon can offer.
(paid link)
9. Ribbon-Wrapped Ornament Hangers
Instead of standard metal ornament hooks, wrap a short length of narrow ribbon around the top of select ornaments before hanging them, letting a small tail hang down alongside the ornament. This is a detail most people never notice consciously, but it adds a cohesive ribbon touch throughout the tree beyond just the big statement placements.
10. Plaid Ribbon for a Classic American Look
Plaid or buffalo check ribbon reads as instantly seasonal and pairs especially well with a traditional red, green, and cream color story. Use it for your main spiral or cascade if your overall palette leans classic rather than modern, since plaid’s visual busyness can clash with sleeker, more minimalist ornament styles.
11. Ribbon Tucked Behind Ornament Clusters, Not Over Them
When you have a cluster of ornaments grouped (your hero zone, if you’re following our tree wow-factor guide), tuck ribbon ends behind the cluster rather than draping ribbon directly across the front of it. This lets the ornaments stay the visual focus in that specific zone while the ribbon still contributes texture from just behind.
12. A Ribbon “Belt” at the Tree’s Widest Point
Wrap a single band of ribbon horizontally around the tree’s widest point, roughly a third of the way up, like a belt. This is a bold, graphic technique that works best on a fuller, more traditionally shaped tree, and it pairs surprisingly well with a diagonal spiral above and below it as long as the belt ribbon is a slightly different width so it reads as a distinct element.
13. Miniature Bows Scattered as “Confetti” Accents
Rather than a few large bows, scatter ten to fifteen small, uniform bows evenly across the entire tree as a repeating accent, similar to how you’d scatter small ornaments. This creates a subtle, all-over texture rather than a few standout focal points, and it’s a good option if your tree already has a strong ornament color story you don’t want to compete with.
EDITOR’S PICK
🛒Wire Ribbon Bow Maker Tool
Scatter 10–15 small uniform bows evenly across the tree for subtle all‑over texture that won’t compete with a strong ornament color story.
(paid link)
14. Sheer Ribbon Layered Over Solid Ribbon
Combine a sheer, organza-style ribbon with a solid ribbon underneath in the same spiral or cascade, letting the sheer layer sit slightly offset so both are visible. The sheer layer catches light differently and adds a soft, almost glowing quality that a single solid ribbon can’t achieve on its own.
15. A Single Statement Bow Replacing the Topper Entirely
Instead of a traditional star or finial topper, use one large, structured bow as the topper itself. This works especially well with a ribbon-heavy tree overall, since it ties the topper directly into the same ribbon story running down through the rest of the tree, rather than introducing a completely different topper material.
16. Ribbon Tails Left Long and Loose at the Base
Rather than trimming every ribbon end neatly, leave a few tails from your spiral or cascade intentionally long, letting them rest naturally against lower branches or even brush the tree collar. This adds a slightly relaxed, “just tied” quality that reads as more current than perfectly trimmed, uniform ribbon ends throughout.
17. Metallic Wire-Edge Ribbon for Extra Shape Control
Wire-edge ribbon with a metallic finish holds loops and curves especially well, making it a strong choice for elaborate bow shapes with multiple loops rather than a simple single-loop bow. The wire edge also means the ribbon catches and reflects light along its curved edges, adding sparkle without needing additional metallic ornaments.
18. Layering Three Ribbon Widths in One Bow
For a truly full, dimensional bow, layer three different ribbon widths together wide, medium, and narrow cut to slightly different lengths so all three are visible in the finished loops. This technique takes more ribbon and more time than a standard bow, so reserve it for one or two hero placements rather than trying to replicate it throughout the tree.
19. Tartan or Plaid Ribbon Mixed With a Solid
Rather than using plaid ribbon alone, pair it with a solid ribbon in one of the plaid’s accent colors for your spiral or bows. The solid ribbon acts as a visual “rest” between busier plaid sections, preventing the pattern from feeling overwhelming across a full spiral’s length.
EDITOR’S PICK
🛒Tartan Plaid Ribbon Roll
Pair plaid ribbon with a solid accent ribbon in your spiral to create visual rest and keep the pattern from overwhelming the tree.
(paid link)
20. Ribbon Woven Into a Garland Rather Than Standalone
Weave a length of ribbon through an existing faux garland before placing it on the tree, so the two elements move as one rather than being layered separately afterward. This pre-assembly step takes a bit more prep time but results in a more integrated look than adding ribbon and garland to the tree as two separate steps.
21. A Cluster of Small Bows at Branch Intersections
Rather than random placement, tie small bows specifically at points where two or three branches naturally intersect or overlap, using the branch structure itself as a mounting point. This placement strategy tends to distribute bows more evenly and naturally across the tree than trying to eyeball spacing on an open branch tip.
22. Ombré Ribbon for a Gradient Effect
Ombré ribbon, which shifts gradually from one shade to another along its length, adds a gradient effect when used in a spiral, transitioning color as it winds from top to bottom. This is a more advanced, statement-making choice best suited to a tree that isn’t already juggling multiple other patterns or textures.
23. Metallic Ribbon Reserved for the Top Third Only
Rather than metallic ribbon throughout, reserve it specifically for the top third of the tree, switching to a matte or fabric ribbon lower down. This creates a natural gradient of shine from top to bottom that mirrors how light and attention naturally travel down a tree, and it keeps metallic ribbon from overwhelming the whole design.
EDITOR’S PICK
🛒A Metallic Gold Wired Ribbon Roll
Use metallic ribbon only on the top third, with matte below, for a balanced shine gradient that keeps the overall look from feeling metallic-heavy.
(paid link)
24. The Final Balance Check for Ribbon Placement
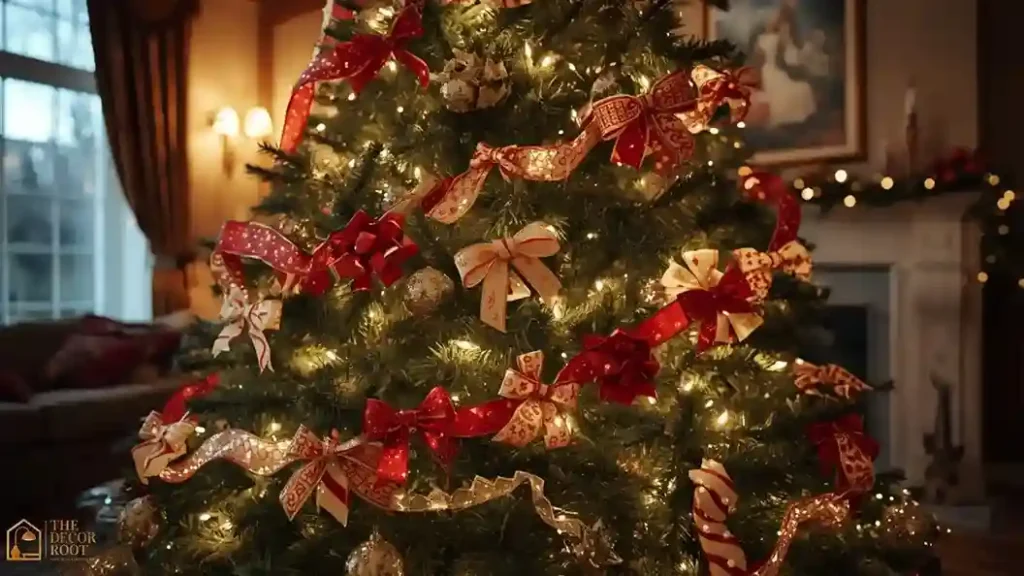
Once your ribbon and bows are placed, step back and check that no single side of the tree has noticeably more ribbon than another a common mistake when working continuously in one direction around the tree. Walk a full circle and add or shift one or two bows if one side reads heavier than the rest, the same way you’d check ornament balance.
For a full tree-styling approach beyond just ribbon, see our 23 Christmas Tree Ideas: Holiday Wow Factor guide, which covers lighting and ornament layering to pair with these ribbon techniques.
Quick Action Plan
- If you’re starting from a completely bare tree, decide first whether ribbon is your star or your support (see the section above), then execute just one hero technique, the diagonal spiral (Idea 1) or the bow cascade (Idea 4), before adding any smaller accent bows.
- Once that main technique is in place and you can see how much ribbon it actually used, add two or three smaller techniques from this list, like branch-tip ties (Idea 5) or a topper bow (Idea 15), to round it out without overdoing it.
Frequently Asked Questions
Conclusion
Ribbon and bows can do far more than “finish” a tree; used with a real technique behind them, they can be the whole story. Pick one hero technique from this list to anchor your tree, then layer in one or two supporting touches, and resist the urge to try all 24 at once.
💾 Save this to your Ribbon and Bow Ideas board, so you have every technique on hand while you decorate.