

Home Office Desk Setup Ideas: How to Set Up a Desk That Stays Organized
home office desk setup ideas start with one fact, not one organizer. The desk clutters because it has no zones, no cable route, and no paper exit, so every object lands on the work surface and stays there. Most desk setup lists skip that fact and show a tidy desk, then call the setup done. A setup earns its order from the system you build first, and the system is zones, cable routes, paper flow, light, clearance, and a two minute reset.
This article promises a desk that stays organized past the first week. You get three named desk zones, a four zone cable route, a paper inbox with a weekly clear out, a 30 to 36 inch chair clearance rule, a two minute daily reset, and 12 researched picks mapped to the jobs where they work. Nothing here asks you to buy a new desk, and nothing here asks one organizer to carry the whole desk.
This article is research based curation, not hands on testing. Where a detail could not be verified, it is left out rather than guessed, and you should check size, color, and contents on the live listing before ordering. The numbers quoted from other sites, the front 18 inch active zone, the 30 to 36 inch chair clearance band, and the 20 to 28 inch screen distance, are their figures, not tested claims.
How these picks were chosen: each pick was researched from listing and source pages and checked at the publish date. No star rating is claimed for any pick. Check size, color, and contents on the listing before ordering, because listings and variants change. Where a detail cannot be verified, it is left out rather than guessed.
Affiliate disclosure: This article contains affiliate links to products on Amazon. As an Amazon Associate I earn from qualifying purchases. The price you pay stays the same, and the commission helps keep The Decor Root running.

Set Up Your Desk in Zones, Then Give Every Cable a Route Home
A desk has three zones, and every object on it belongs to one of them, so the first job is to name the zones and give each object a home. The active zone is the front 18 inches directly in front of you, and it holds only what you are using now: the monitor or laptop, the keyboard, the mouse, the current notebook, and one pen.
The reference zone is within arm reach but not on the main work surface, and it holds what you reach for during the day: the planner, the phone, the charger, the water bottle, and one pen holder. The storage zone is everything else, off the desk entirely, in drawers, on a shelf, or in a tray, because an object with no named zone lands on the work surface by default.
Cables get the same treatment, in four zones of their own. Cable Zone 1, the desktop, carries only the short usable length for the laptop, phone, keyboard, mouse, and headphones. Cable Zone 2, moving equipment, carries the monitor, dock, lamp, and desk control leads, routed along the desktop or the monitor arm. Cable Zone 3, under the desk, carries the power strip, the adapters, and the excess cable length, in a tray. Cable Zone 4, desk to wall, is one planned bundle or power lead to the wall, kept away from feet and walkways. Map every connection first, then buy the tray, because a tray bought before the map holds the wrong cables in the wrong place.
The desk itself, the chair, the riser, and the layout that this setup sits on, is shown in home office design ideas.
| Desk zone or measure | What lives there |
|---|---|
| Active zone | Monitor or laptop, keyboard, mouse, current notebook, one pen; the front 18 inches directly in front of you |
| Reference zone | Planner, phone, charger, water bottle; within arm reach, not on the main work surface |
| Storage zone | Everything else, off the desk entirely, in drawers, on a shelf, or in a tray |
| Cable Zone 1, desktop | Only the short usable length for laptop, phone, keyboard, mouse, headphones |
| Cable Zone 2, moving equipment | Monitor, dock, lamp, and desk control leads routed along the desktop or monitor arm |
| Cable Zone 3, under desk | Power strip, adapters, and excess cable length in a tray |
| Cable Zone 4, desk to wall | One planned bundle or power lead to the wall, kept away from feet and walkways |
| Chair clearance, standard task chair | 24 inches minimum, 30 inches recommended, 36 inches ideal |
| Chair clearance, comfortable band | 30 to 36 inches lets most people roll back, swivel, and stand |
| Chair clearance, tight setup with no passage | About 30 inches can work when no one must pass behind the chair |
| Chair clearance, larger chair or walkway | 42 to 48 inches for a large or high back chair; 48 to 60 inches when the desk sits against a wall with your back to the room |
The table figures come from named guides, and the chair clearance band stays scoped to a standard or ergonomic chair with no walkway behind it. The desk zones come from re-design.app, Wakefit, and DormRoomBlueprint, the cable zones come from OdinLake and Hexcal, and the chair clearance figures come from Ergoprise, EngineerFix, EffyDesk, and Burotic.
The 30 to 36 inch band is the comfortable range for a standard chair, not a building code rule, and a large or high back chair needs 42 to 48 inches, while a desk against a wall with your back to the room needs 48 to 60 inches. Measure from the back edge of the desktop to the nearest wall or furniture, because the clearance is the space the chair moves in, not the space the desk takes up.
A Quick Check: Can You Roll Back, Stand, and Reach Your Charger Without Moving Anything Else
Sit at the desk, roll the chair back, stand up, and reach the charger, and if anything on the desk moves, falls, or blocks the way, the zone that failed is the zone to fix. A chair that hits the wall means the clearance is short, a charger that needs a stretch means the reference zone is too far, and a cable that pulls means the route is wrong. Run the check before you buy anything, because the check names the job, and the job names the pick.
Home Office Desk Setup Ideas: Start With a Clear Desk and Three Named Zones
Clear the desk completely before you organize it, because a desk organized one object at a time keeps the clutter it already has, and a desk cleared first gets zones that hold. Take everything off, wipe the surface, and put back only what belongs in the active zone, the front 18 inches, because the active zone is the work surface and the rest of the desk is not. The reference zone takes what you reach for during the day, and the storage zone takes everything else off the desk entirely, so the desk ends the job with one clear work surface and two named homes for the rest.
A desk pad marks the active zone on the surface, so the boundary is visible and the zone holds. The YSAGi pad below, at 35.4 by 17 inches in khaki, covers the front of the desk where the keyboard and mouse live, and it protects the surface while it doubles as a large mouse pad, so the active zone has a visible edge and the keyboard never drifts past it. A desk narrower than 35.4 inches needs a shorter pad, because a pad that overhangs the desk edge curls and lifts, and the zone it marks stops holding.
Also solves this: the work surface that needs a marked active zone, not the desk that needs a hard writing surface
YSAGi Leather Desk Pad Protector, Office Desk Mat, PU Leather, Khaki, 35.4 x 17 Inches
PU leather desk pad; non-slip; waterproof; 35.4 x 17 inches; khaki colorway for this ASIN, as printed. Marks the boundary of the active zone on the desktop, protects the surface, and doubles as a large mouse pad. Not for: A desk narrower than 35.4 inches wide, or anyone who wants a hard surface for writing without a pad.
(paid link)
Name the zones out loud, because a zone with no name is a zone that fills up again. The active zone holds the work, the reference zone holds the reach, and the storage zone holds the rest, and anything that fits none of the three leaves the desk, because a desk with no storage zone is a desk where everything is active. A desk in a living room corner uses the same three zones, and the living room version of the change is shown in transitional living room ideas.
Map Your Cables Before You Buy a Single Organizer
Map every connection before you buy a single organizer, because a tray bought before the map holds the wrong cables in the wrong place. List each cable by its two ends, laptop to wall, monitor to dock, lamp to strip, phone to charger, and draw the route each one takes through the four cable zones, because the map shows which cables share a route and which ones need their own length. A cable with no route on the map is a cable that ends up on the floor, and a cable on the floor is a cable that gets kicked, pulled, and unplugged.
The under desk home for the power strip and the excess cable length is the Cinati tray below, and the no-drill clamp is the reason it leads. The tray clamps to desks 0.4 to 2.4 inches thick with no drilling, at 13.4 inches long and 4.6 inches wide, and it holds up to 10 lb, so the power strip and the adapters live under the desk instead of on the floor. The kit brings one tray, four cable clips, and six cable ties, so the tray, the clips, and the ties arrive as one job, not three separate orders.

Bundle each cable run so the tray holds neat groups instead of one loose nest, and the ties that do it are the VELCRO pack below. Sixty reusable hook and loop straps at 8 by half an inch, in multicolour, bundle each run and reopen when a cable changes, so the tray stays grouped when the setup changes. They are reusable ties, not a tray or a box, and they do not hide a power strip on their own, so they work with the tray, not instead of it.
Also solves this: the cable runs that need bundling and re-bundling, not the power strip that needs hiding
VELCRO Brand ONE-WRAP Cable Ties, 60 Pack, 8 x 1/2 Inch, Multicolor
60 pack; 8 x 1/2 inch straps; multicolor; reusable, self gripping hook and loop ties for cable and cord bundling, as printed. Bundles each cable run so the tray holds neat groups instead of one loose nest, and reopens when a cable changes. Not for: Anyone who wants a permanent fix; these are reusable ties, not a tray or a box, and they do not hide a power strip on their own.
(paid link)
A lidded home for the power strip is the alternative when an under desk tray does not suit the desk, and the D-Line box below is that alternative. At 16.5 by 6.5 by 5.25 inches in white ABS, it holds the strip with cables entering and leaving through the box slots, so the strip sits on the floor out of sight instead of under the desk. Power strips longer than 10.5 inches inside the box do not fit, per the EverydayGearPicks research note, and a setup where the strip must stay fully open for daily plug changes needs the tray, not the box.
Also solves this: the power strip that needs a lidded home, not the strip that must stay open for daily plug changes
D-Line Cable Management Box, Power Strip Holder, Large, White, Model US/CTULGEW/SW
Large, white; 16.5 x 6.5 x 5.25 inches; ABS construction; power strip holder and cord organizer; model US/CTULGEW/SW, as printed. A lidded home for the power strip when an under desk tray does not suit the desk, with cables entering and leaving through the box slots. Not for: Power strips longer than 10.5 inches inside the box, per the EverydayGearPicks research note, or a setup where the strip must stay fully open for daily plug changes.
(paid link)
Route the cables in the order the map gives, tray first, then ties, then the single bundle to the wall, because a cable routed in the wrong order crosses the cables routed after it. Test the full travel on a standing desk, raising and lowering the desk through its whole range, because a cable that fits at sitting height can pull tight at standing height, and the test catches it before the first workday.
Put the Screen at Eye Level and the Keyboard in the Active Zone
A screen that sits too low makes the neck and shoulders pay for it by midday, because the head tilts down to meet the screen and stays there for hours. The fix is height, not a new monitor, and the rule is the top of the screen at or just below eye level, with the screen 20 to 28 inches away, so the eyes look straight ahead and the neck stays neutral. Raise the screen in steps, not all at once, because a screen raised too high makes the neck tilt back, which is the same problem in the other direction.
The monitor riser below is the lift for a fixed monitor, and the three heights are the reason it leads. The HUANUO stand adjusts to 3.94, 4.72, and 5.51 inches, with airflow vents under the screen, and it fits monitors, laptops, PCs, and printers, with laptops up to 15.6 inches. The space below the screen opens up for storage, which creates the top of the zone system, so the riser gives height and a shelf in one piece. Confirm the live listing shows the single pack figures before ordering, because the 2 pack variant lists different heights, and no weight capacity is claimed here, because the single pack sources found at research time do not state one.

A laptop needs the same lift, and the Nulaxy stand below is the portable version of it. The dual foldable aluminum stand, model C1 in silver, lifts a laptop screen toward eye level so the reader stops hunching, with a heat vent panel for airflow under the laptop, and it fits laptops 10 to 16 inches. It folds flat when the desk is used for other work, so it suits a laptop that moves between desks, and it is not a fixed monitor riser, so a setup that needs a fixed riser should use the HUANUO above instead.
The keyboard stays in the active zone, in the front 18 inches, with the mouse beside it, because the keyboard is the work and the work lives in the active zone. A keyboard pushed to the back of the desk means the arms reach past the notebook and the phone to get to it, and the shoulders pay for the reach by midday. Keep the current notebook and one pen in the active zone with the keyboard, and move everything else to the reference zone or off the desk, because the active zone holds the work and nothing else.
Give Paper One Inbox and One Weekly Clear Out
Paper piles up because it has no inbox and no exit, so every sheet lands on the desk and stays there, and the desk becomes a filing pile. The fix is one inbox and one weekly clear out, and the inbox is the Amazon Basics tray set below. Two letter trays and one accessory tray, each 13.4 by 10 by 2.7 inches, modular and stackable, give one tray for incoming paper, one for active paper, and the accessory tray for the tools that belong with paper, so every sheet has a named place the moment it arrives.

Also solves this: the paper that needs one inbox, not the paper load that needs a vertical file sorter
Amazon Basics Rectangular Plastic Desk Organizer Bundle, 3 Pieces Letter Tray and Accessory Tray, White
Bundle includes 2 letter trays and 1 accessory tray; each tray measures 13.4 x 10 x 2.7 inches; modular and stackable design, as printed. The paper inbox: one tray for incoming paper, one for active paper, and the accessory tray for the tools that belong with paper. Not for: Legal size paper, or a paper load that needs a vertical file sorter rather than flat stacking trays.
(paid link)
The weekly clear out is the exit, and it runs once a week, not once a month, because a monthly clear out is a pile that has already won. File what must be kept, act on what must be done, and recycle the rest, and the inbox empties back to one tray, so the desk starts the next week with paper in one place and nowhere else.
A vertical station beside the desk holds the paper that must stay visible, and the Marbrasse five tier organizer below is that station: alloy steel mesh, five paper letter tray tiers, a sliding drawer, two pen holders, and a magazine holder, in black, so paper and pens live in one place beside the desk instead of spreading across the work surface.
Paper earns its place by having an exit. An inbox with no clear out is a pile with a tray under it, and a clear out with no inbox is a pile with no home, so the two work as one system, and the desk keeps one tray of paper and no more.
Keep Daily Tools in One Caddy and the Rest Off the Desk
Pens, chargers, and tools scatter because they have no fixed home, so they migrate across the work surface and end up in the active zone, where they crowd the keyboard. The fix is one caddy in the reference zone and the rest off the desk, and the caddy is the Marbrasse pen holder below. Metal mesh, powder coated, with 11 compartments including a drawer, non-skid feet, in black, model Mesh B17, it gives pens and daily tools one fixed home in the reference zone, so they stop migrating across the work surface.

Also solves this: the pens that migrate across the work surface, not the paper that needs a file organizer
Marbrasse Mesh Pen Holder for Desk, Multi-Functional Pencil Organizer with Drawer, Model Mesh B17, Black
Metal mesh, powder coated; 11 compartments including a drawer; non-skid feet; black; model Mesh B17, as printed. Gives pens and daily tools one fixed home in the reference zone, so they stop migrating across the work surface. Not for: A desk that needs a full file organizer; this is a pen and tool caddy, not a paper tray.
(paid link)
The rest goes off the desk, into the storage zone, and the storage zone inside a drawer is the SMARTAKE tray set below. Seven clear plastic trays in four sizes, with silicone non-slip pads, model HK042, build the storage zone inside a drawer, so spare cables, chargers, and tools have fixed compartments instead of a loose drawer pile. A drawer with trays is a storage zone that holds, and a drawer without trays is a second desk surface hidden inside the first one.
Also solves this: the drawer that holds a loose pile of cables and chargers, not the desk that needs deep bins
SMARTAKE 7-Piece Drawer Organizer with Non-Slip Silicone Pads, 4-Size Desk Drawer Organizer Trays, Clear, Model HK042
7 piece set; 4 tray sizes; clear plastic trays with silicone non-slip pads; model HK042, as printed. Builds the storage zone inside a drawer, so spare cables, chargers, and tools have fixed compartments instead of a loose drawer pile. Not for: A desk with no drawer to fit the trays, or a reader who needs deep bins for bulky items.
(paid link)
One caddy and one drawer of trays are the whole tool system, because a desk with two caddies has two reference zones and a desk with no drawer trays has no storage zone. Keep the daily tools in the caddy, keep the spares in the drawer, and keep the active zone for the work alone.
Light the Work Zone Without Stealing Desk Space
Light is wrong on most desks because the lamp takes the space the work needs, so the lamp base sits in the active zone and the keyboard moves to make room for it. The fix is light from above the screen, with no base on the desk, and the Quntis light bar below is that fix. A 41 cm bar with 78 LEDs, USB powered, auto dimming, touch control and remote control, at 3000K to 6500K, fits monitors 17 to 27 inches, model LI-HY-0214-BK, and it lights the work zone from above the screen, so no desk lamp base eats surface space and the keyboard stays lit without glare on the screen.

Also solves this: the work zone that needs light with no lamp base on the desk, not the laptop screen that needs a clip light
Quntis Computer Monitor Lamp, Screen Monitor Light Bar, USB, Model LI-HY-0214-BK, Black
41 cm light bar; 78 LEDs; USB powered; auto dimming; touch control and remote control; color temperature 3000K to 6500K; fits monitors 17 to 27 inches; model LI-HY-0214-BK, as printed. Lights the work zone from above the screen, so no desk lamp base eats surface space and the keyboard stays lit without glare on the screen. Not for: Laptop screens or curved monitors, per the listing fit notes, or a monitor outside the clip range; confirm the clip fit on the live listing before ordering.
(paid link)
Set the bar once and leave it there, because a light that needs adjusting before every work session is a light that stays off. The whole-house version of the same warm light plan, with the evening Kelvin plan room by room, is shown in winter lighting ideas. The window side of the same light plan, with curtains that cut glare without darkening the room, is shown in winter curtain ideas.
Measure 30 to 36 Inches of Chair Clearance Before You Place the Desk
Measure the chair clearance before you place the desk, because a desk placed first leaves the chair nowhere to go, and the chair ends up against the wall with no room to roll back, swivel, or stand. Measure from the back edge of the desktop to the nearest wall or furniture, and plan 30 to 36 inches behind the desk for a standard or ergonomic chair, with 24 inches as the bare minimum. A large or high back chair needs 42 to 48 inches, and a desk placed against a wall with your back to the room needs 48 to 60 inches, because the clearance is the space the chair moves in, not the space the desk takes up.
The comfortable band is 30 to 36 inches, and it lets most people roll back, swivel, and stand without moving anything else, so it is the figure to plan around for a standard chair with no walkway behind it. A tight setup with no passage can work at about 30 inches, when no one must pass behind the chair, but a setup where someone must pass behind the chair needs the larger figures, because the passage is a walkway and the walkway needs its own space.

Feet that dangle make the chair area never settle, because the feet search for the floor and the posture shifts all day, so the foot rest below closes the last gap in the clearance zone. The Everlasting Comfort adjustable cloud foot rest, memory foam at 17 by 10 by 6 inches, with dual adjustable straps, pressure point nodes, and a non-slip base, supports feet flat under the desk, and the height adjusts by adding or removing the base. Confirm the live page shown is the newer adjustable cloud foot rest and not the older version, because the older version is not adjustable.
Also solves this: the feet that dangle under the desk, not the desk that has no under desk foot room
Everlasting Comfort Adjustable Cloud Foot Rest for Under Desk at Work, Memory Foam, with Pressure Point Nodes
Memory foam; 17 x 10 x 6 inches; dual adjustable straps; pressure point nodes; non-slip base; adjustable height by adding or removing the base, as printed. Supports feet flat under the desk so the chair position stays settled inside the measured clearance zone. Not for: A desk with no under desk foot room, or anyone who wants a hard plastic adjustable footrest rather than a memory foam rest.
(paid link)
The floor under the chair matters too, because a chair that rolls on a bare floor drifts and a chair that rolls on a rug stays put, so the floor under the clearance zone is part of the setup, not an afterthought. The floor under the chair, with a rug that stays put while the chair rolls, is shown in winter rug ideas.
Build a Charging Spot at the Back Corner
Build one charging spot at the back corner of the desk, because a phone with no fixed spot lands on the work surface, and a phone on the work surface is a distraction in the active zone. The back corner is the reference zone, within arm reach but off the work surface, so the phone charges where it can be seen and reached without entering the front 18 inches. One spot, one charger, one short cable in Cable Zone 1, and nothing loose on the desk.
Run the charging cable as a short usable length only, from the charger to the phone, with the rest of the cable routed down to the under desk tray, because a long cable on the desktop coils, catches the mouse, and pulls the phone off the desk. Keep the charging spot fixed, so the phone always goes to the same corner, and the habit forms in a week, because a spot that moves is a spot that never becomes a habit.
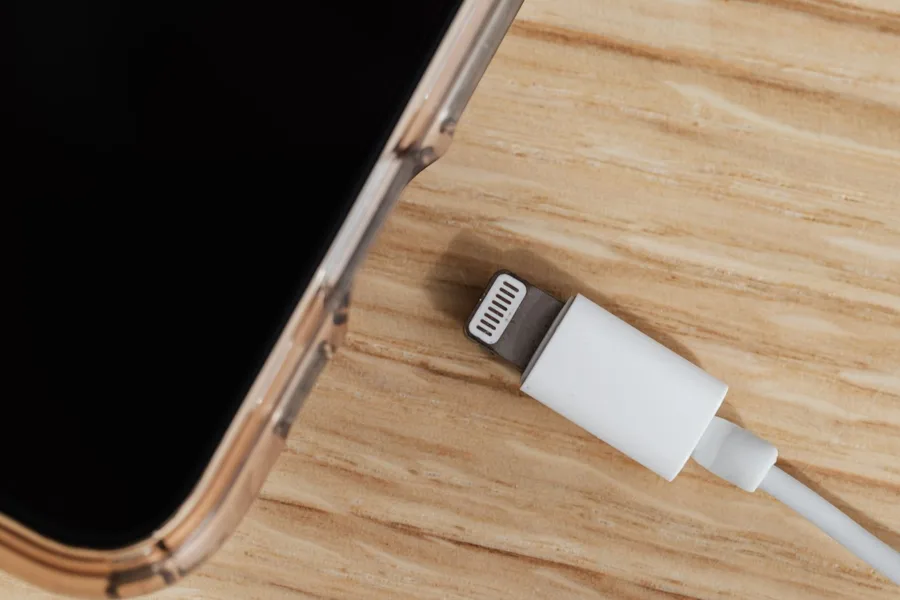
A charging spot earns its place by staying at the back corner. One phone, one charger, one short cable, and the desk keeps its work surface clear while the phone charges within reach, while a charger that lives in the active zone is a charger that fights the keyboard for space.
Run a Two Minute Reset at the End of Every Workday
Run a two minute reset at the end of every workday, because the reset is what keeps the desk organized past the first week, and no organizer does that job on its own. Two minutes, every day, in the same order: clear the active zone back to the monitor, keyboard, mouse, notebook, and one pen; file the paper from the inbox or move it to the active tray; return the tools to the caddy and the drawer; coil the cables back into their zones; and close the laptop. The desk starts the next day clear, and the zones hold, because the reset is the habit that keeps the system honest.
The reset works because it is short and it is daily, and a reset that takes ten minutes is a reset that gets skipped, while a reset that takes two minutes gets done. Time it for a week, and cut any step that takes more than thirty seconds, because the reset must fit between the last task and the walk away from the desk, and a reset that needs a timer is a reset that needs a shorter list.

The evening version of the same reset, with the bedroom readied for sleep at the end of the day, is shown in winter bedroom ideas.
When the Desk Clutters Again, Fix the Zone, Not the Whole Desk
When the desk clutters again, fix the zone, not the whole desk, because clutter always starts in one zone and the whole desk reorganization is the fix that never happens. Diagnose by zone: cables spilling means Cable Zone 3 needs the tray checked; paper piling means the inbox needs its weekly clear out; tools scattering means the caddy needs its home restored; the chair hitting the wall means the clearance needs measuring again. Fix the one zone that failed, and the desk holds, because the system is built to be repaired one zone at a time.
Six mistakes undo a desk faster than any missing purchase, and all six are system mistakes, not buying mistakes. Buying an organizer before mapping the cables, so the tray holds the wrong cables. Filling the active zone with tools, so the keyboard has nowhere to go. Raising the screen too high, so the neck tilts back instead of forward. Skipping the weekly paper clear out, so the inbox becomes a pile with a tray under it. Putting the charger in the active zone, so the phone fights the keyboard. And skipping the two minute reset, so the zones drift back to clutter in a week. Skip all six, and the desk stays organized past the first week.
The seasonal version of the same desk setup, with warm autumn layers and a seasonal refresh, is shown in fall home office ideas. The same refresh instinct in another room, with a wall that changes the whole room, is shown in laundry room wallpaper ideas.
FAQs
1. How do I keep my desk organized for more than a week?
Ans: Give the desk three named zones, active, reference, and storage, and run a two minute reset at the end of every workday so nothing drifts back onto the work surface. The zones give every object a home, and the reset is the habit that keeps the system honest, so the desk starts each day clear.
2. How much space do I need behind my desk chair?
Ans: Plan 30 to 36 inches behind the desk for a standard or ergonomic chair, measured from the back edge of the desktop to the nearest wall or furniture, with 24 inches as the bare minimum. A large or high back chair needs 42 to 48 inches, and a desk against a wall with your back to the room needs 48 to 60 inches.
3. Where do cables go in a tidy desk setup?
Ans: Route every cable to one under desk tray, keep only a short usable length on the desktop, and send one bundle from the tray to the wall outlet. Map every connection first, bundle each run with reusable ties, and keep the single bundle to the wall away from feet and walkways.
4. What are the three desk zones?
Ans: The active zone holds what you are using now, the monitor or laptop, keyboard, mouse, current notebook, and one pen, in the front 18 inches. The reference zone holds what you reach for during the day, the planner, phone, charger, and water bottle, within arm reach. The storage zone holds everything else off the desk entirely, in drawers, on a shelf, or in a tray.
5. Do I need a new desk to fix a cluttered desk?
Ans: No. Most cluttered desks need zones, one cable route, and one inbox for paper, not new furniture. Clear the desk, name the three zones, map the cables to one tray, give paper one inbox with a weekly clear out, and run the two minute reset, and the desk you own stays organized.
Bottom Line: home office desk setup ideas come down to this: name three zones, route every cable to one tray, raise the screen to eye level, give paper one inbox with a weekly clear out, keep daily tools in one caddy, light the work zone without a lamp base, measure 30 to 36 inches of chair clearance, and run a two minute reset at the end of every workday. One tray, one inbox, one caddy, and one reset are the whole plan, and the rest is a matter of keeping the order honest.
Pin these home office desk setup ideas to your board before your next workday so your desk starts clear and stays clear all week.
Photos via Pexels. Photo credits: home office desk setup ideas by Polina Zimmerman; rear view of a desk with a monitor by Pavel Danilyuk; monitor and keyboard on a desk by Pew Nguyen; white papers on a wooden table by Valentin Sarte; pencils and pens in a black metal container by Jonathan Borba; lamp, mouse and keyboard on a desk by Shaira Osmani; office chair and desk by Lisa Fotios; smartphone and charger USB connector on a wooden table by Kaboompics; a laptop and mouse with pad on the table by alleksana.